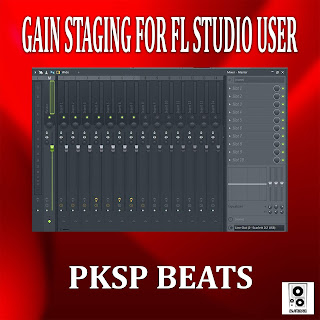
Gain Staging for FL Studio Users.
Gain Staging for FL Studio Users.
Hello all my producer friends out there. I wanted to share this tip with you all called Gain Staging.
I remember when I first started to learn to mix it was a pain and time-consuming. Who wants to sit for hours mixing a song, but I learned this was what I wanted to do to be good at it.
So curious to know what gain staging is let me tell you, a gain stage refers to any point in a production where you can control the volume level of a device or track. Gain staging is the process of managing all of these volume levels within a project to achieve the cleanest mix possible. Who doesn't want a clean final mix right?
Step 1
Adjust your levels if they're not already to default. You do this in the Mixer and the Channel Rack for each Track by Right-Clicking and choosing "Reset". Do it now or regret it later!
This gives you a fresh start to leveling all tracks to -12db. I use -12 cause that works for me. Others use -18db which is a rule of thumb due to digital DBS is different from analog DBS. Use what works for you but -12 is just fine to start.
Step 2
Adjust your levels using your Channel Rack Volume knobs or in Channel Settings, you need to watch your levels on the Master Volume and lower your volumes to -12db for each mixer track that has a sound no matter the sound.
This is the start of creating a headroom and ensuring a clean final mix.
Step 3
Boost your Master Volume to the top and leave it until you have completed your mixing of all your tracks. This is what creates headroom in your final mix.
Step 4
Adjust your levels in the Mixer for each track that has a sound, instrument, or vocal. At this point you can also begin EQing or Adding Effects to your tracks. You can follow EQing charts if you have if you need to contact me I can point you in the right direction. The main thing at this point is never to touch your Master Volume only the mixer track levels to get a good mix of your sounds. Once you are done and have a good mix at this point it is ok to "Reset" your Master Volume back to default like in the first step. Right, Click, and hit Reset.
Step 5
Open up Maximus and Choose Max Loudness with no Saturation. This is going to boost the levels you lost from Gain Staging. I use this preset cause this is the sound I prefer for my mixes. Feel free to experiment, but keep in mind the more knobs you change the harder it will be to remember what you did to get to where you want to be when you try again. I suggest finding a setting you like and save it as a preset for later.
Step 5.1
Open Limiter and Choose Max Loudness with slight Saturation. Does the same as Maximus, but with a little saturation to introduce some harmonics to the mix. Once again play around with the setting if you like until you find a sound of mix you like and save it as a preset for later.
Step 6
Finally, adjust your levels for exporting MP3s or WAVs using Soft Clipper. MP3s are set to -6db and WAVs are set to -3db. This is done by boosting the Threshold up to the max by going to the right. Then you use the Post knob to adjust to -3 or -6db. This is where you complete your mix and export files for uploading track outs or files for listening on the web. I usually upload MP3s for downloadable tracks or for listening on platforms like IG, Soundcloud, Youtube, etc. I hope this helps some of you with an easier means of mixing your tracks to post or send out beats. I want to encourage all Producers and Beat Makers please Mix your tracks stop sending out products that do not sound "Radio Ready". Your tracks will be rejected if they do not sound professional or another engineer can not mix them when you send track outs.
Thanks, Stay Safe Stay Blessed
PKSP Beats


Comments
Post a Comment